How does it work
You can use the Ninja Forms integration to create a custom submit ticket form and replace the built-in form that WPHelpDesk includes.
The integration comes as a plugin that can be installed like any other WordPress plugin. For more information, please check the relevant article in our documentation.
Please note that as a minimum requirement, you need WPHelpDesk version 1.2.10 (or higher) installed. If you are not on that (or a higher) version, please update WPHelpDesk before continuing. The add-on will work with Ninja Forms version 3.3.7 and above. Although it will work with some older versions as well, it is always advised to use the latest version.
How to configure Ninja Forms to submit tickets to WPHelpDesk
Step 1 – Enable the integration
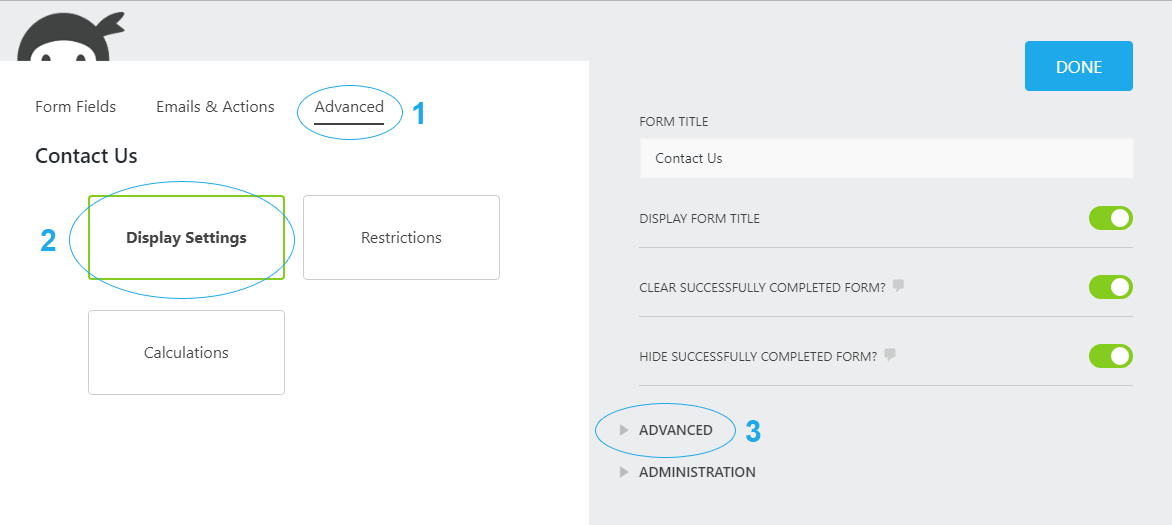
From the Ninja Forms interface, either create a new form or edit an existing one. Click on the Advanced tab, then on Display Settings, and expand the Advanced section at the right of the screen.
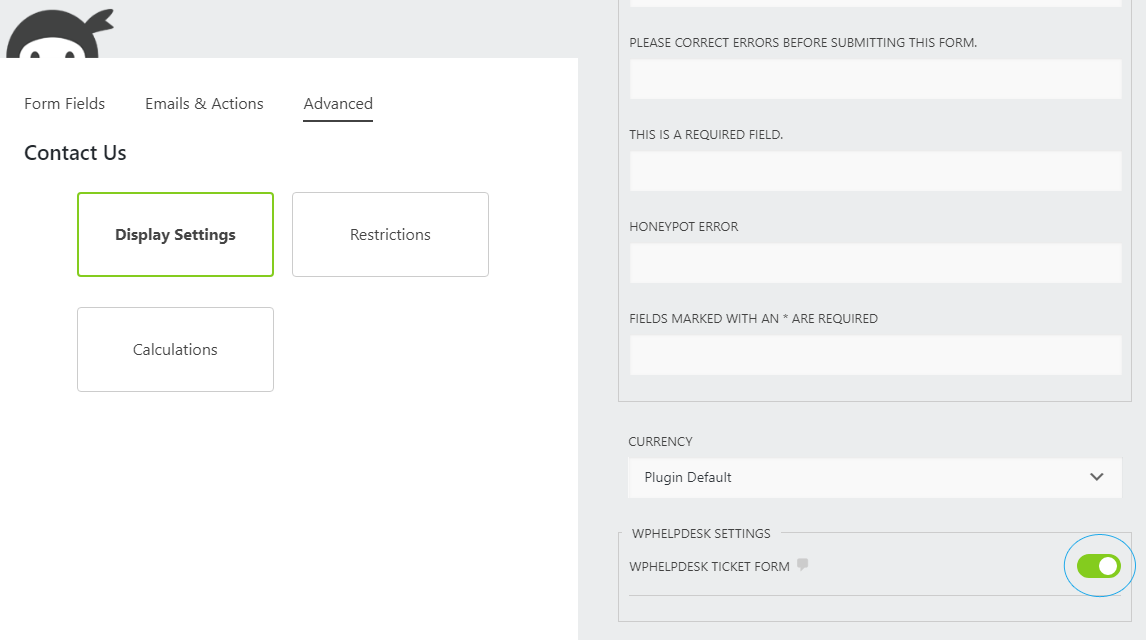
Then, scroll down at the bottom of the Advanced section, locate the “WPHelpDesk Ticket Form” option, and enable it.
Step 2 – Map the fields
The next step is to associate the form fields to their corresponding fields in WPHelpDesk. This will ensure that all required information is sent to the ticket during form submission.
Required fields
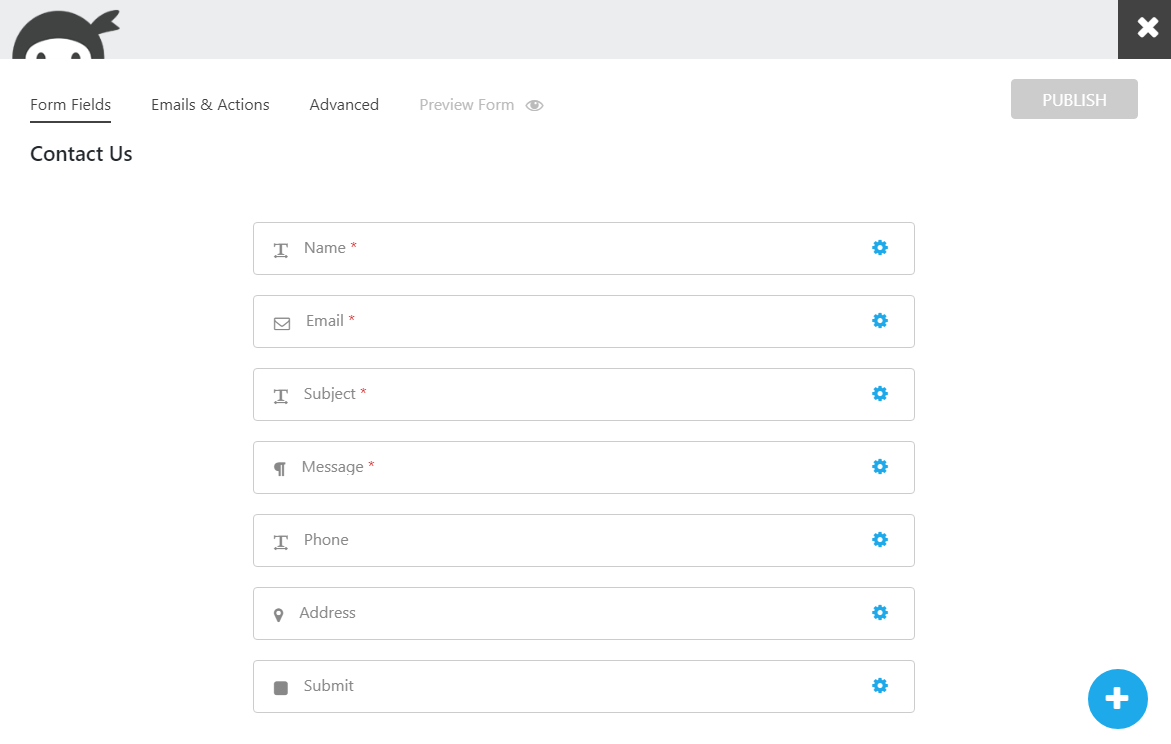
As a minimum requirement, your form needs to include the following four fields:
- Name
- Subject
- Message
These can be labelled in any way you want (e.g. “Name” can be called “Your name”) and will not affect the ability to map them to WPHelpDesk.
Please note that all four fields must be mapped to their respective fields in WPHelpDesk, otherwise the ticket will not be created.
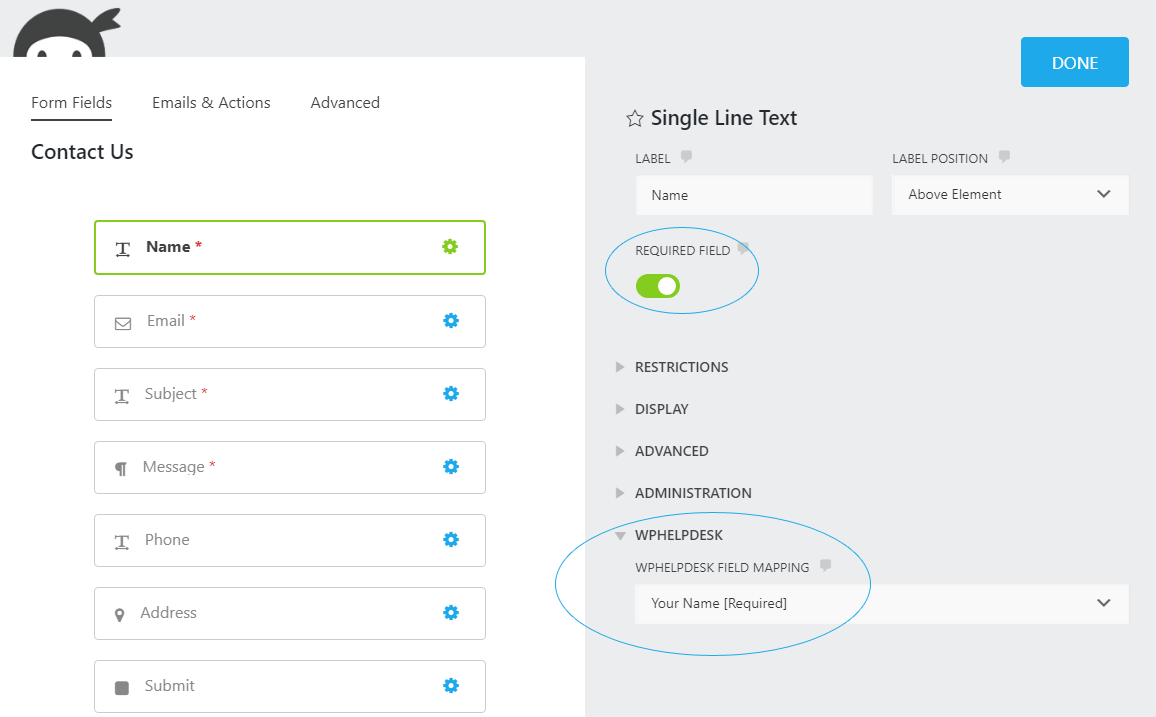
To map a field, click on it to open its settings, then expand the WPHelpDesk section and select the WPHelpDesk field you want to associate it with.
In the example above, the “Name” field is mapped against the “Your Name” field in WPHelpDesk.
Please make sure that you enable the “Required Field” option for all fields that are required by WPHelpDesk, to ensure that they are filled by the user, otherwise, if any of them is missing a value the ticket will not be created.
Please note that we do not currently support file attachments through Ninja Forms.
Custom fields
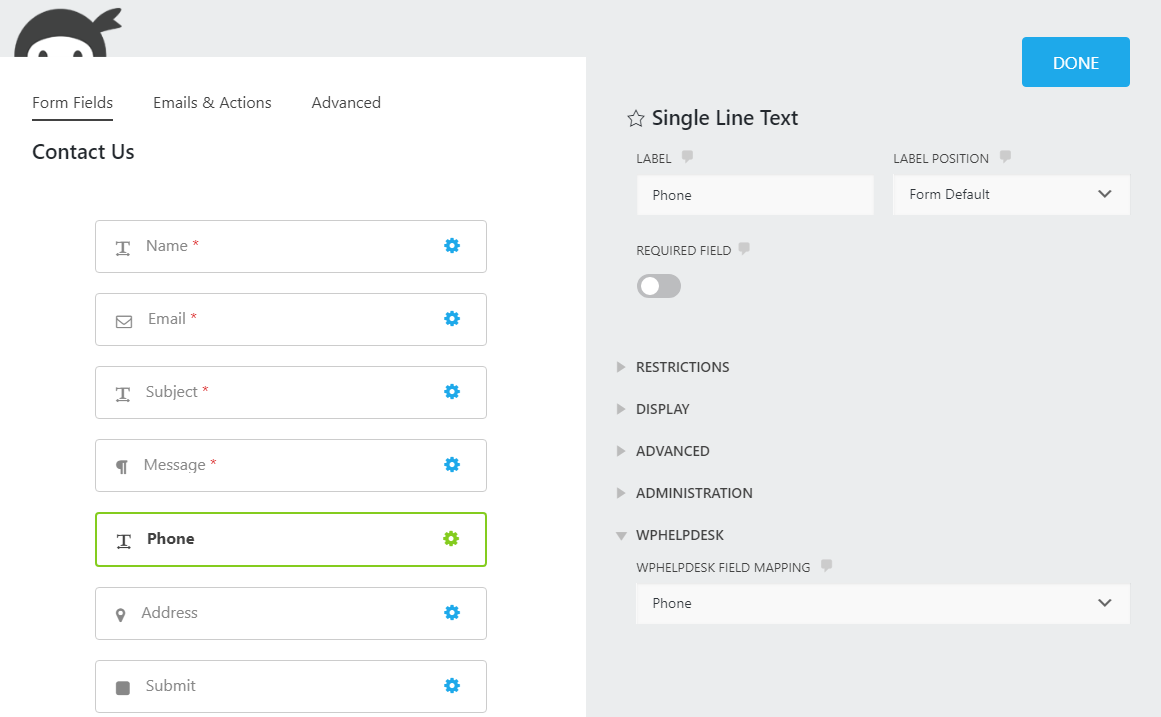
Apart from the four required fields, any custom fields you have created in WPHelpDesk will also appear here.
Mapping text-based custom fields is a very straightforward task. In the example above, the Phone field of the form is mapped to the Phone custom field in WPHelpDesk.
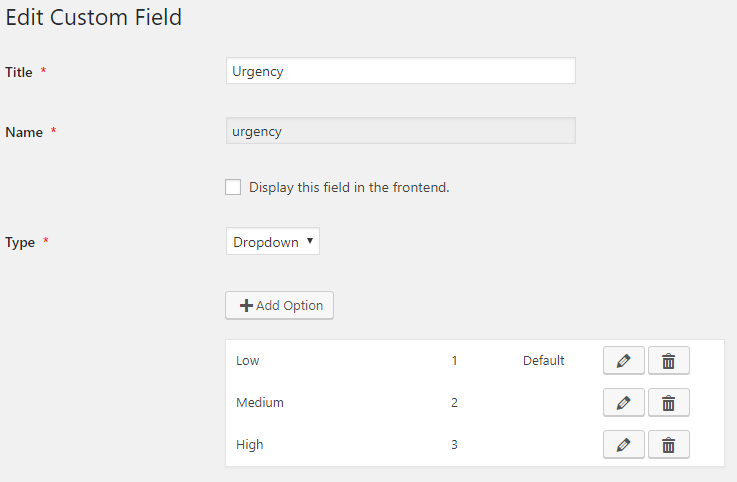
It is possible to map Dropdown custom fields too. As an example, we will map the custom field depicted above. In this example, the custom field has three options:
- Low (Value: 1)
- Medium (Value 2)
- High (Value 3)
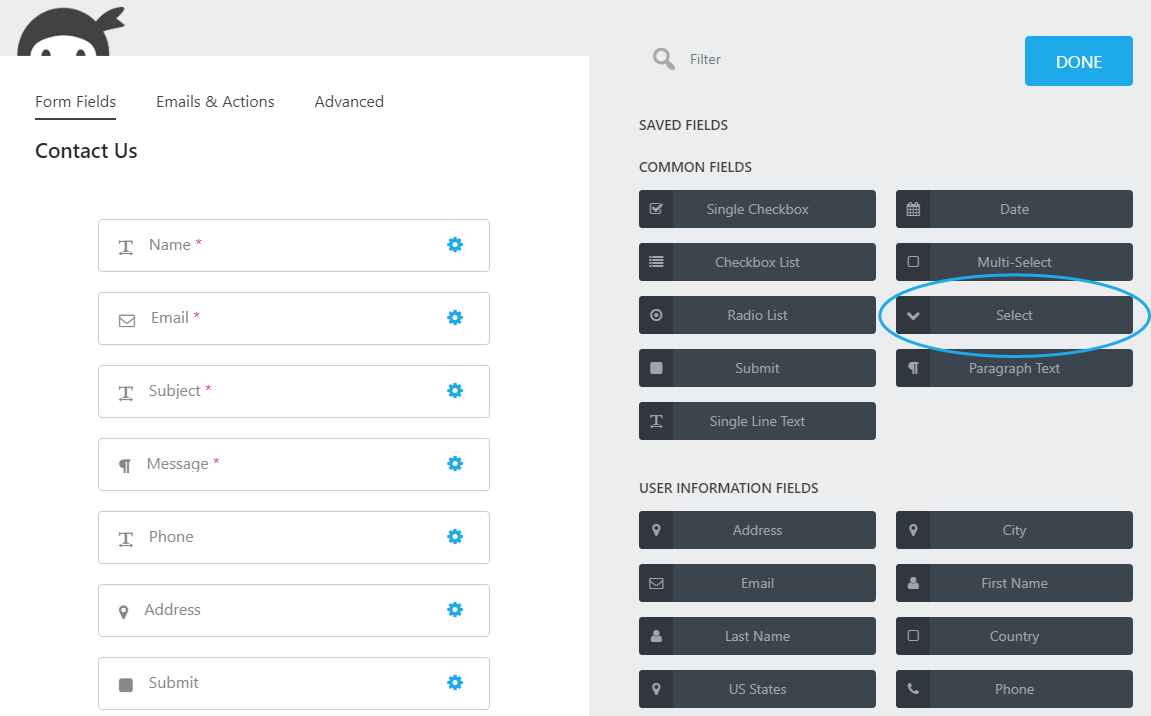
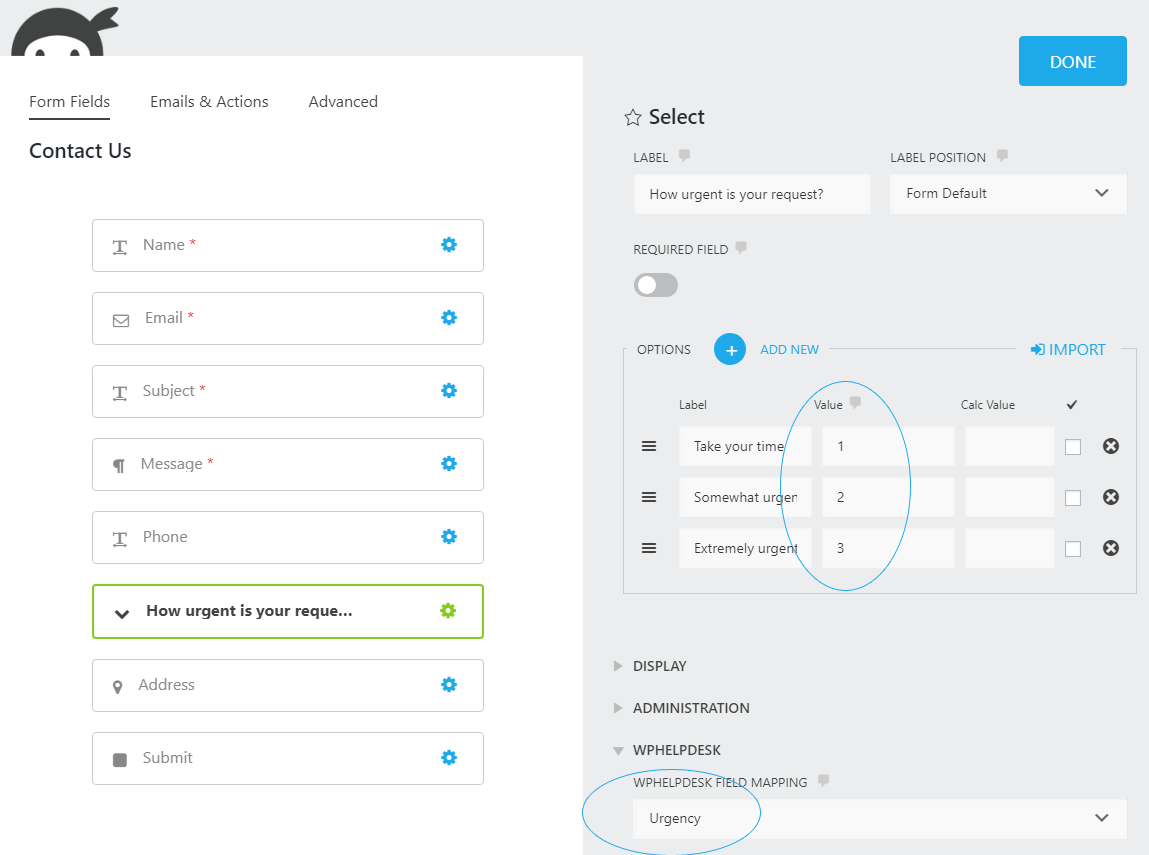
In your form, add a Select field, and click to edit it. You need to include manually the same amount of options as the custom field in WPHelpDesk, making sure that their values match the ones of the custom field. As with every other field, their labels can be different.
So, for example, if the user selects the third option (Extremely Urgent) which has the value of 3, in the ticket, the Urgency custom field will display the option “High” as selected, which also has the value of 3.
Fields without mapping
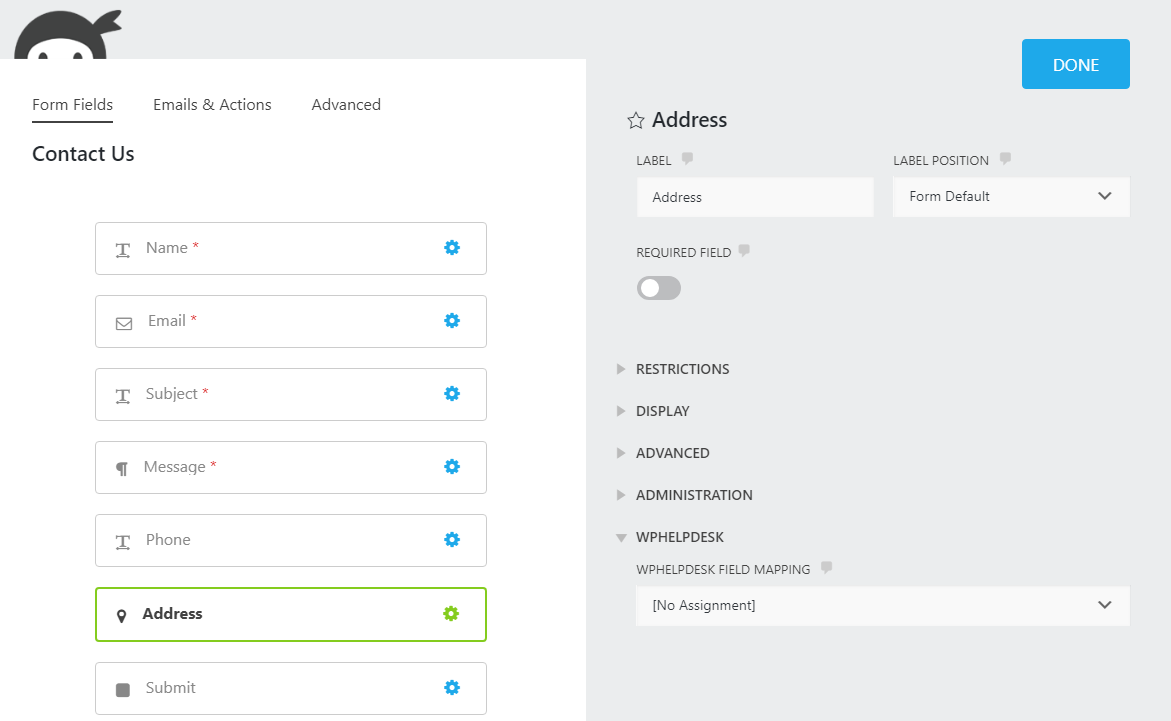
Not all of the fields are required to be mapped to WPHelpDesk. Any unassigned field will still be processed by Ninja Forms and will be stored in the form submission (assuming that you have enabled that option in the Emails & Actions section), but it will not appear in the WPHelpDesk ticket.
In the example above, the Address field is not mapped to any WPHelpDesk field; the [No Assignment] option is selected.
Step 3 – Decide how to handle email notifications
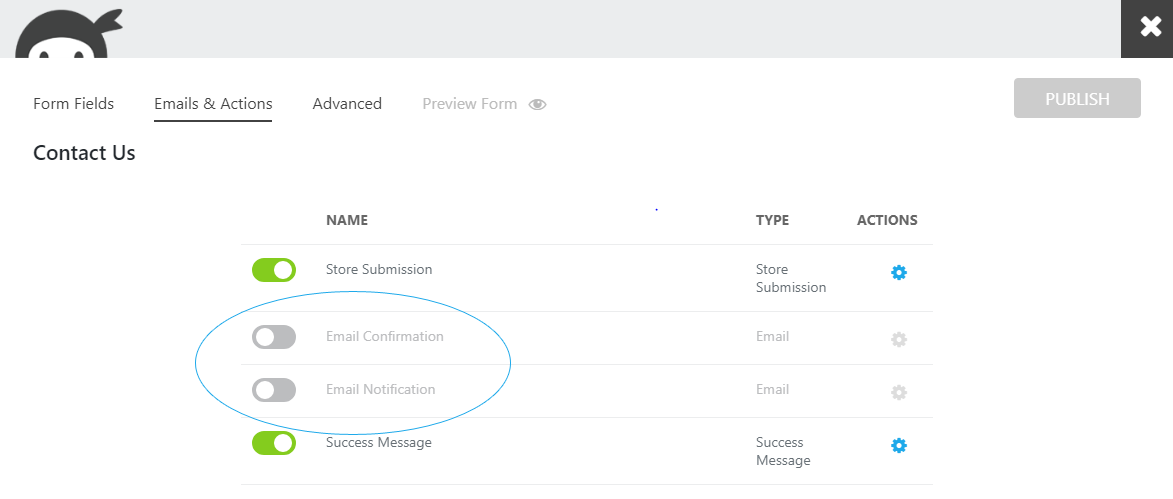
By default, WPHelpDesk will not send any email notifications for the tickets created via Ninja Forms, since usually the form is configured to send notifications itself.
If you wish to let WPHelpDesk handle the email notifications instead, first visit the Emails & Actions section of your form and make sure that you disable both the “Email Confirmation” and the “Email Notification” options.

Then, visit the Ninja Forms tab in the Settings (WP Admin -> WPHelpDesk -> Settings -> Ninja Forms) and enable any of the options related to email notifications. You can also choose to create an account for every user (if they don’t have one already).
Using the Ninja Forms Integration and Email Piping add-on at the same time
If you configure Ninja Forms to send an email with the submitted form to an admin and you are using the Email Piping add-on to import email messages as tickets, then please make sure that either the emails sent from Ninja Forms are not being sent to the same email WPHelpDesk is importing emails from, or that they land in a folder other than the one Email Piping is configured to import emails from. These steps will ensure that emails sent from Ninja Forms will not be imported as new tickets.
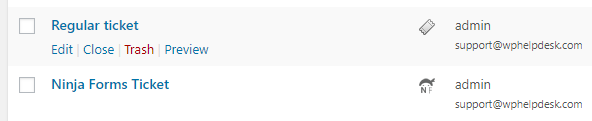
How to identify tickets created via Ninja Forms
In the Tickets listing, tickets that were created via Ninja Forms will show a different icon other than the usual ticket one, as depicted below. They will still look and behave like regular tickets that are created via the built-in form.